Chapter 1 - Administrators Guide
This Administrators Guide is designed for
those responsible for setting up and maintaining the Staffinder infrastructure.
This infrastructure includes all data and settings necessary to enable
the complete and proper operation of the program. Once Staffinder
is configured with your company's departments, employees, in/out choices
and other settings, it can be maintained by IT or selected Staffinder administrators.
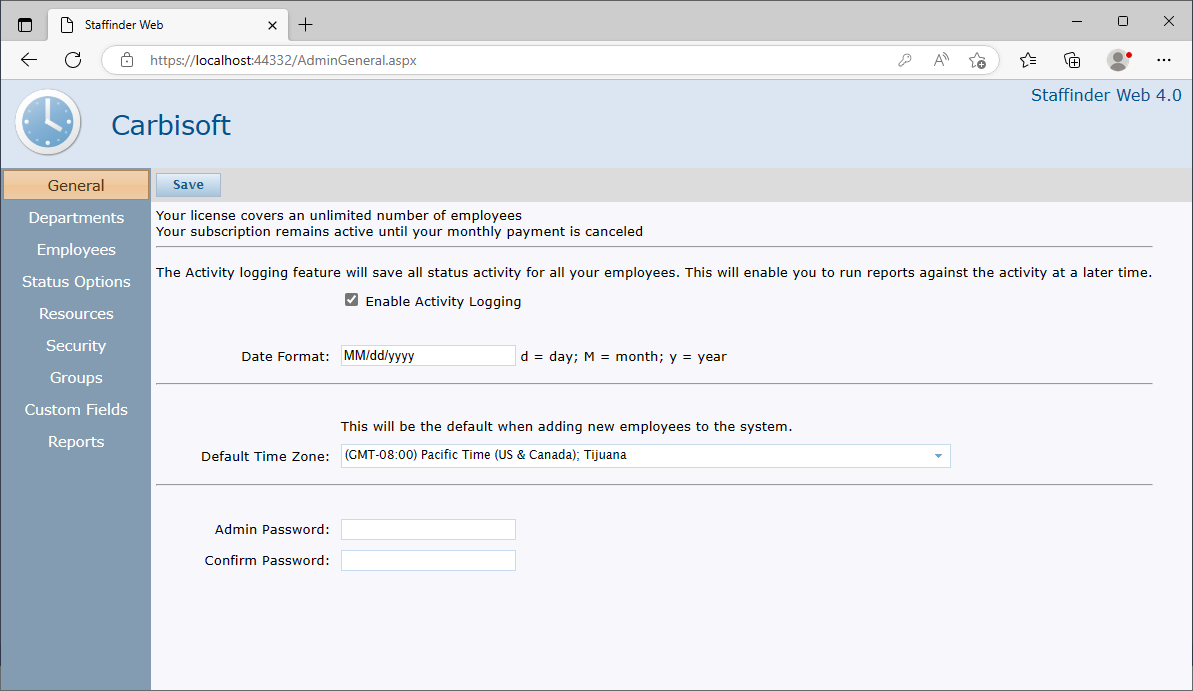
| Setting up your Organization (General) |
- The first page is where you setup your Activity Logging and the
date format that you want your dates to appear. The Activity
Logging will allow Staffinder to save each persons activity as they
sign in and out throughout the day. You will then be
able to run reports on this activity as needed. If you turn
off this feature then you will not be able to use the report
features. See the Reports feature later in this chapter for
more information.
- The date format allows you to change the way dates are displayed
in the application.
- The Time Zone sets the default time zone that will be selected
when you add new employees. This saves time so you don't have
to keep selecting it when you add all your people.
- You can also change the administrator password here. This is used when you first setup the company and dont have any users to log in as.
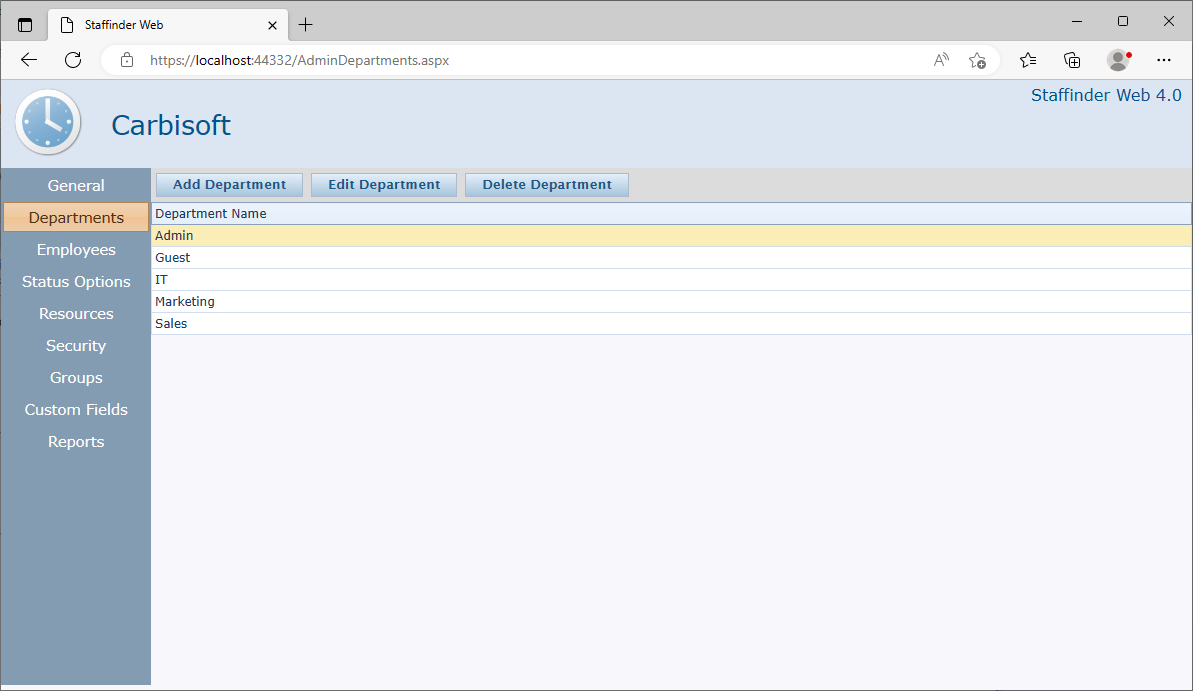
- The next step in setting up your organization is to create the
various departments that exist. You will need to create these
before you add your employees. We have created a few common departments for you.
- There are 3 buttons at the top that allow you to Add,
Edit, and Delete the selected record.
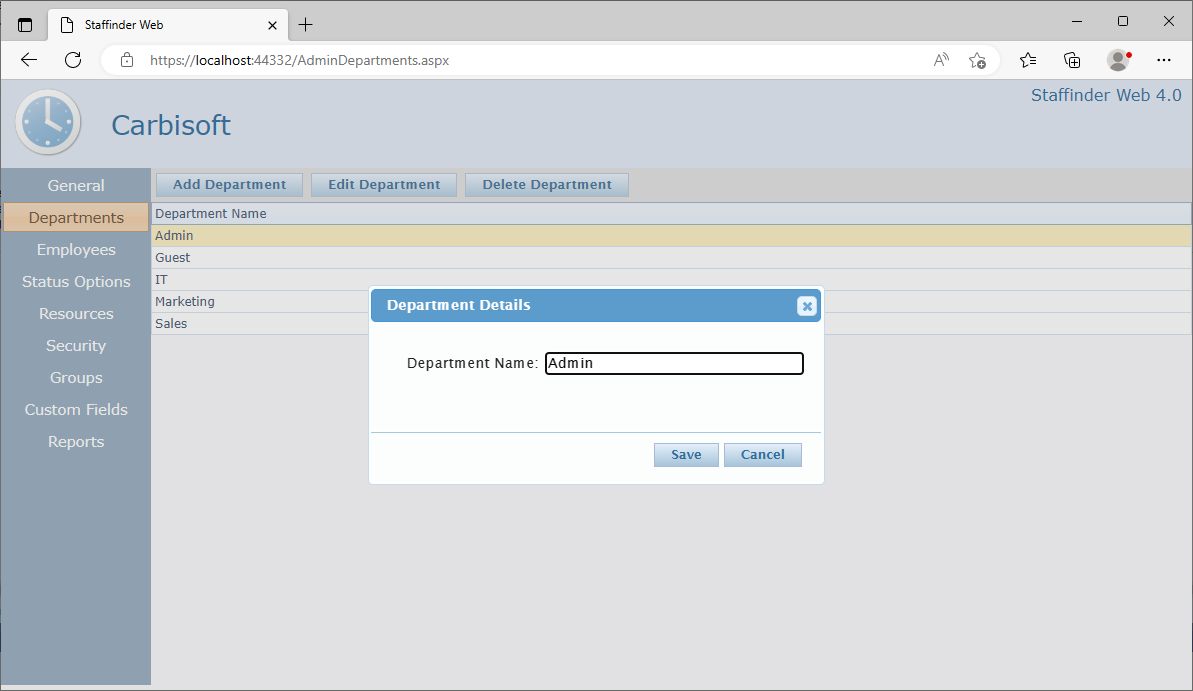
- To add a new department simply click the Add button. The
department details screen will appear and you will be required to
enter the name of the department. Click the Save button
when finished.
- To edit an existing department simply double-click it in the
grid or single click it to highlight it and then click the Edit button.
- To delete a department simply click the row to highlight it and then click the Delete button. First, you will need to change any employees that are assigned to the department.
|
Setting up your Employees
|
Important Note:
The best strategy to use
when adding employees is to add the managers first. While it is not
required to assign users a manager, however, some of the built-in Security functions will not
work if users are not assigned a manager.
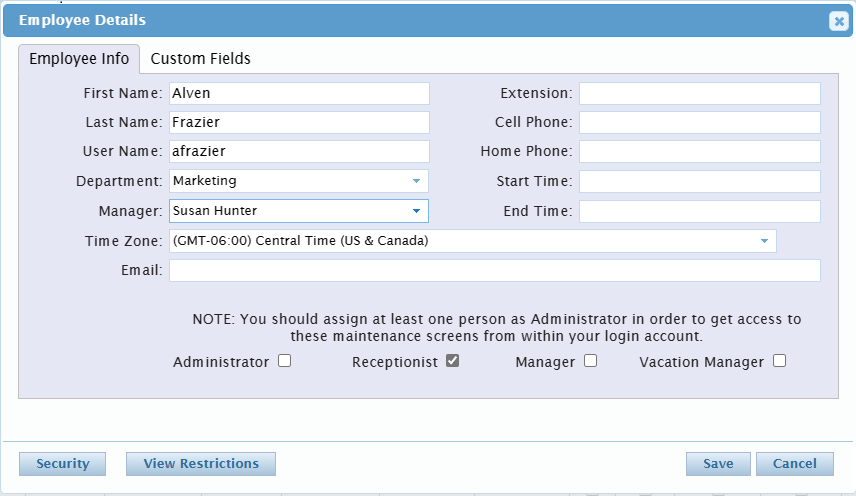
To Add an employee:
- To add an employee click the Add button. The employee
details screen will appear.
- Enter the employee information in the First Name, Last Name
boxes. The User Name field is where you add the name
people will use when logging into the application. This is the
only place where the user name is used. Next enter the Time Zone
this users is located in. This will cause all dates
and times to be displayed in this users time zone. Only the top 4 fields are required.
- If this person has a manager then you need to select the name of
the person from the drop down list.
- The remaining fields are basic information and self explanatory.
- The checkboxes at the bottom are very important.
- The Administrator option will
grant this person access to these administrator features
directly from within the application when they log in.
-
The Reception option will flag this
person as a receptionist and will grant them the ability to
change others status as long as they have enabled the security
feature for receptionists.
- The Manager option will flag
this person as a manager and they will appear in the manager
selection for other employees.
- The Manage Vacations option
will give this person permission to add, edit, and delete
vacation schedulers. If you do not grant this person
permission the they will only be able to view the schedules and
not modify them.
Tip: The checkboxes for Receptionist and Manager are directly related to the security features in Staffinder.

To Delete employees:
- In the existing Employees grid, click the user to be delete.
- Click the Delete button. You will be prompted with a confirmation dialog to make sure.
Tip: If you attempt to delete a manager
who has employees assigned to them, you will receive a warning that
those employees will need to have another manager assigned to them
first.
To Reset an employees Password:
If someone forgets their password you can reset it by selecting them in the grid and clicking the Reset Password button at the top.
|
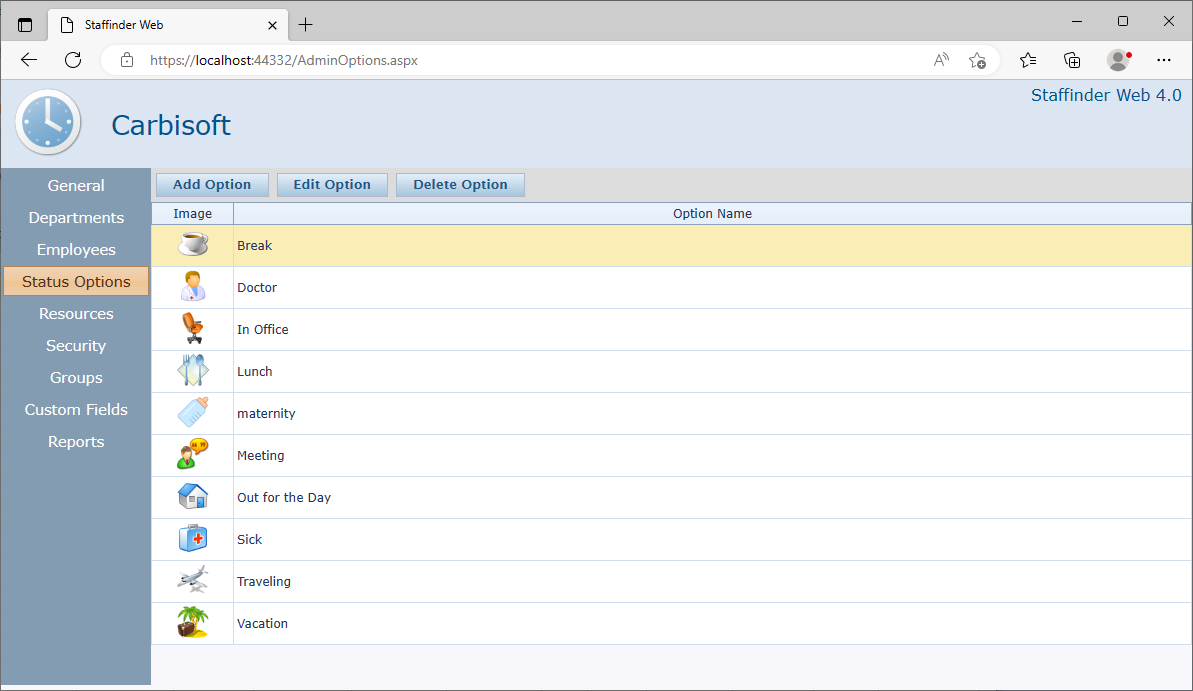
Configuring the In/Out Board Choices
|
Staffinder ships with several
standard In/Out choices. You can remove these or
add additional selections as needed to fit your business needs and
configure them with custom icons if desired.
Adding custom Images to the Application:
We have provided a large number of high quality icons to choose from but in the case you cant find one that suits your needs then feel free to submit your images to our support
department so they can be added to the server. We will be
happy to scale or convert your images for you. If you dont have one then let us know what you are looking for and we can try to find one for you.
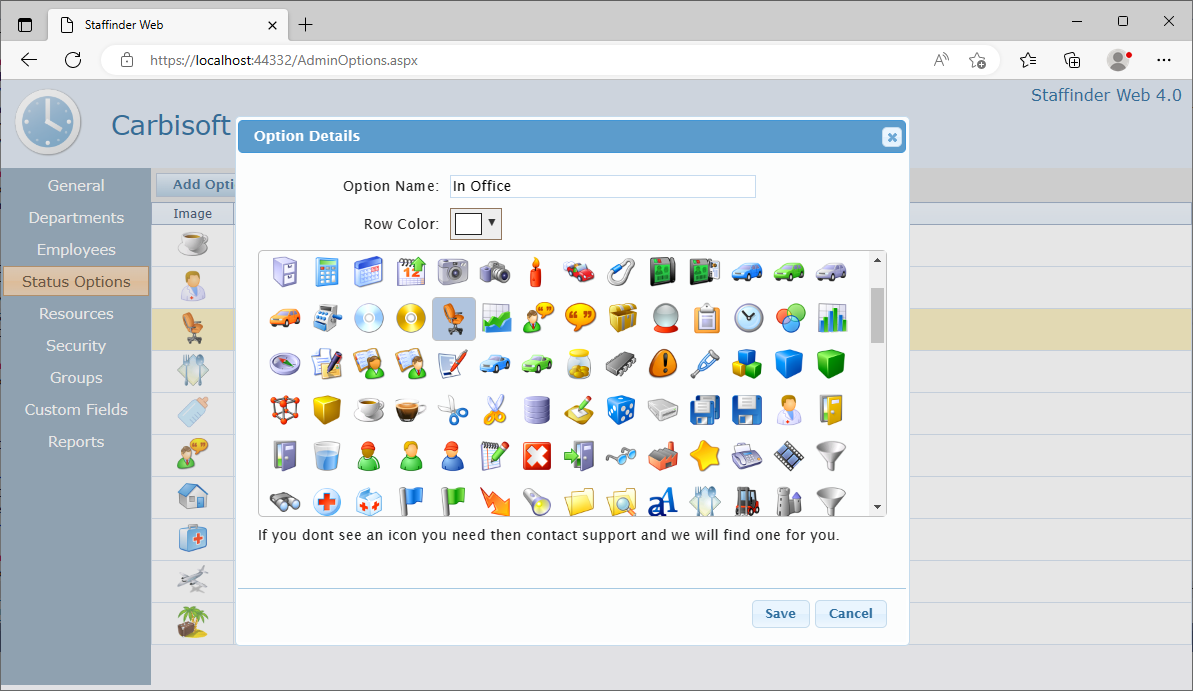
To add Custom In/Out Board
choices:
- Click the Add button. The Options Details screen appears. This screen is resizable so you can enlarge it to show more icons.
- Type the name of the status option in the Name box.
- You can choose a row color if you wish. This will color each row in the browser based on the users status.
- Select the icon you wish to assign to this status from the available images.
- Click the Save button to finish.
To delete Custom In/Out Board choices:
- In the existing options grid, click the option to be delete.
- Click the Delete button or right click on the option and click
delete from the popup menu.
To edit an In/Out Choice:
- To edit an existing option simply double-click it
in the grid or single click it to highlight it and then click the
Edit button.
- Make the necessary changes and click the Save button
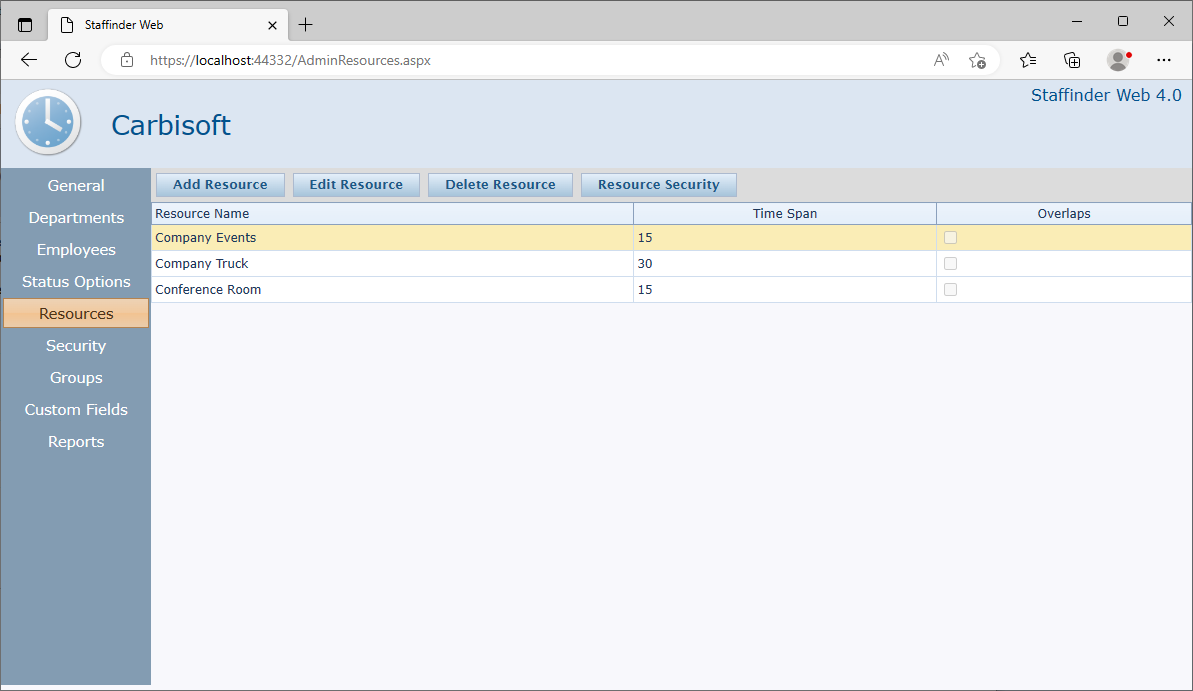
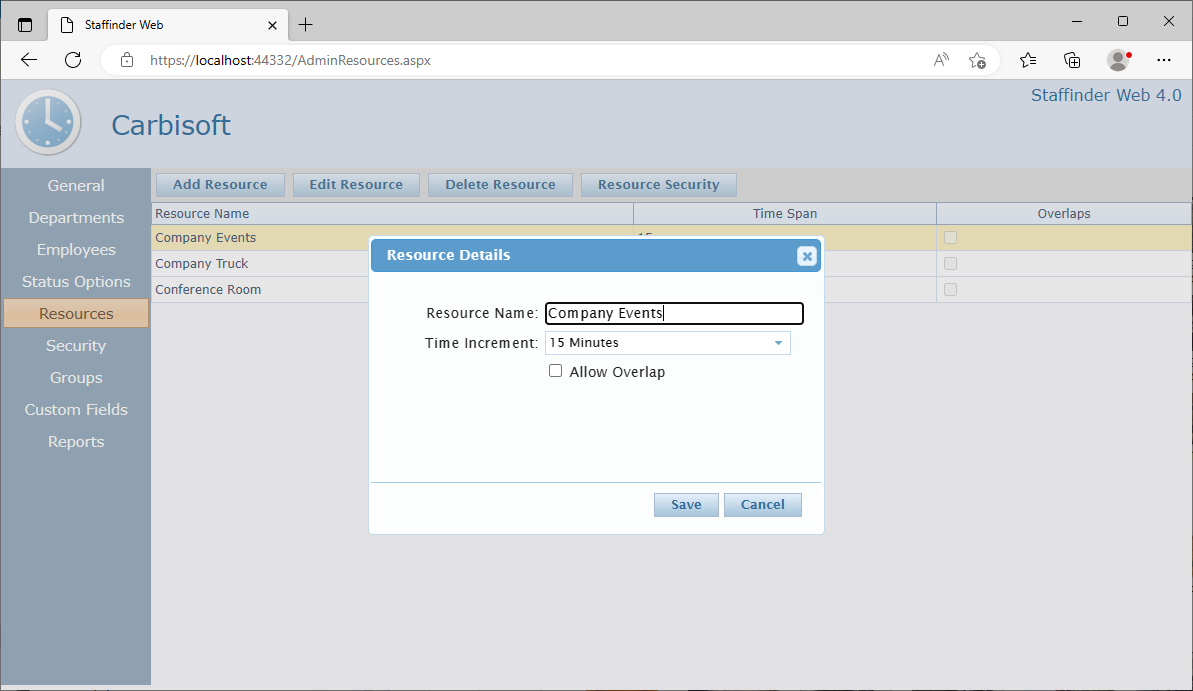
A Resource can be anything you wish to
schedule time against. Conference rooms are the most common
resources but you can use almost anything you like. Video Equipment
such as an In-focus machine is a good example of something you may wish
to keep track of. Depending on what the resource may be will also
determine the time increments you will want to use. We include Company
Events as a pre configured resource. You can use this resource for
any company wide events that employees will want to know about. Company
parties for employee birthdays or retirements are good examples of event
to track.
To add a resource:
- Click the Add button. The Resource
Details screen appears.
- Type the name of the resource in the Name
box.
- Select the time increment you would like the resource
to use.
- Click the Save button. The new resource
will appear in the Resource maintenance grid.
To delete a Resource:
- In the existing resource grid, click the resource to be delete.
- Click the Delete button or right click on the option and click
delete from the popup menu. Any schedules that were associated
with this resource will also be deleted.
To edit a Resource:
- Click the choice in the existing resource list.
- Type the new name in the Name box and/orselect the time increment.
- Click the Save button.
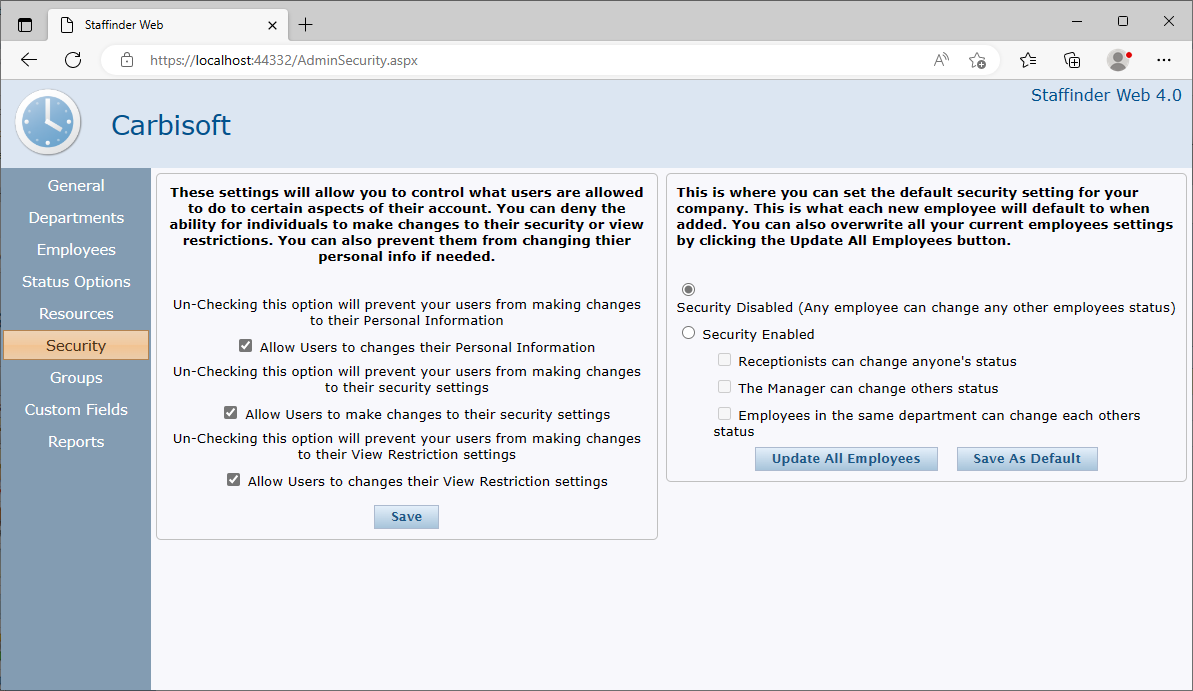
Sometimes you may want to restrict
what your users can change so Staffinder allows you to lockout some
of the features. This allows you to set specific settings
globally and prevent your users from changing them. You must click
the Save button to save your changes.
-
Personal Information: Checking this option will
allow your users to change their own personal information such as phone
numbers, extensions, Email, and any custom fields you may have created.
-
Security Settings: Checking this option will
allow your users to modify their status security. They will be
able to decide who can and cannot change their status.
-
View Restrictions: Checking this option
will allow your users to set their view restrictions. View
Restriction allow a person to hide themselves from other people in
your organization.
The bottom section allows you to setup the default
security settings for your company. This will be the security
setting each new employee gets when they are added to the system.
If you need to change this setting and want to update all the
existing employees then you can use the Update All Employees button
to reset everyone to the new security setting.
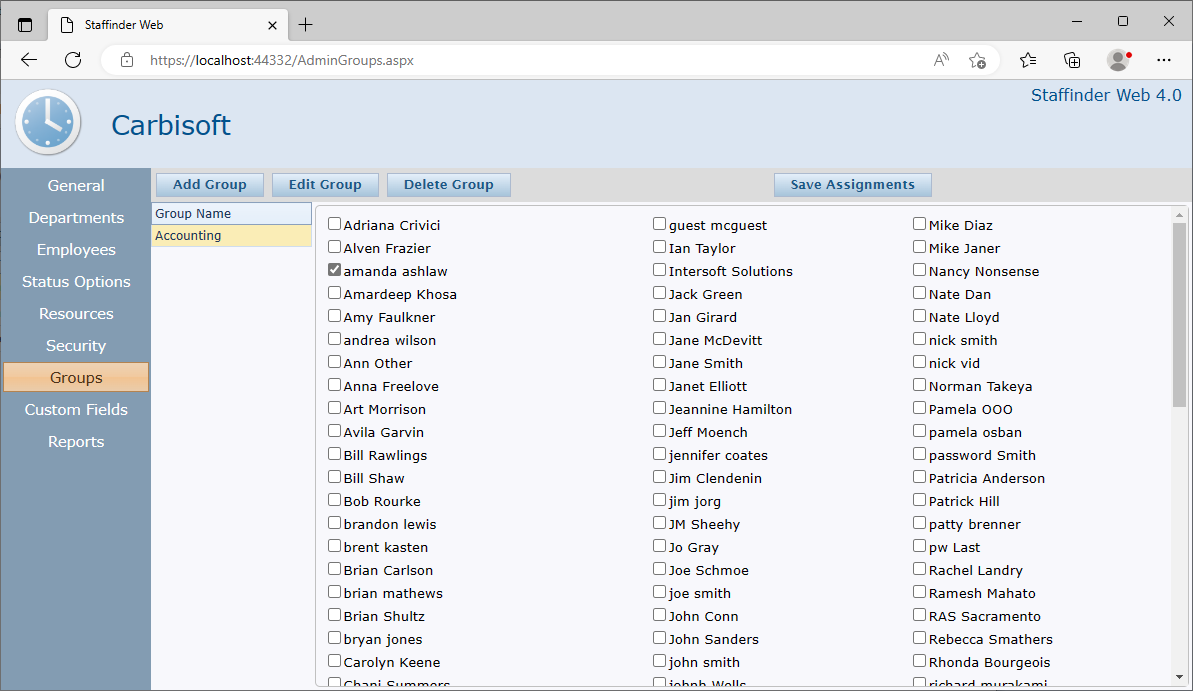
Groups allow you to organize your employees into
manageable pieces. The larger your organization the more important groups
become. Once you have setup your groups you can filter on them within the
Staffinder application. An employee can be a member of multiple groups so
it allows you to create smaller more manageable categories for your people.
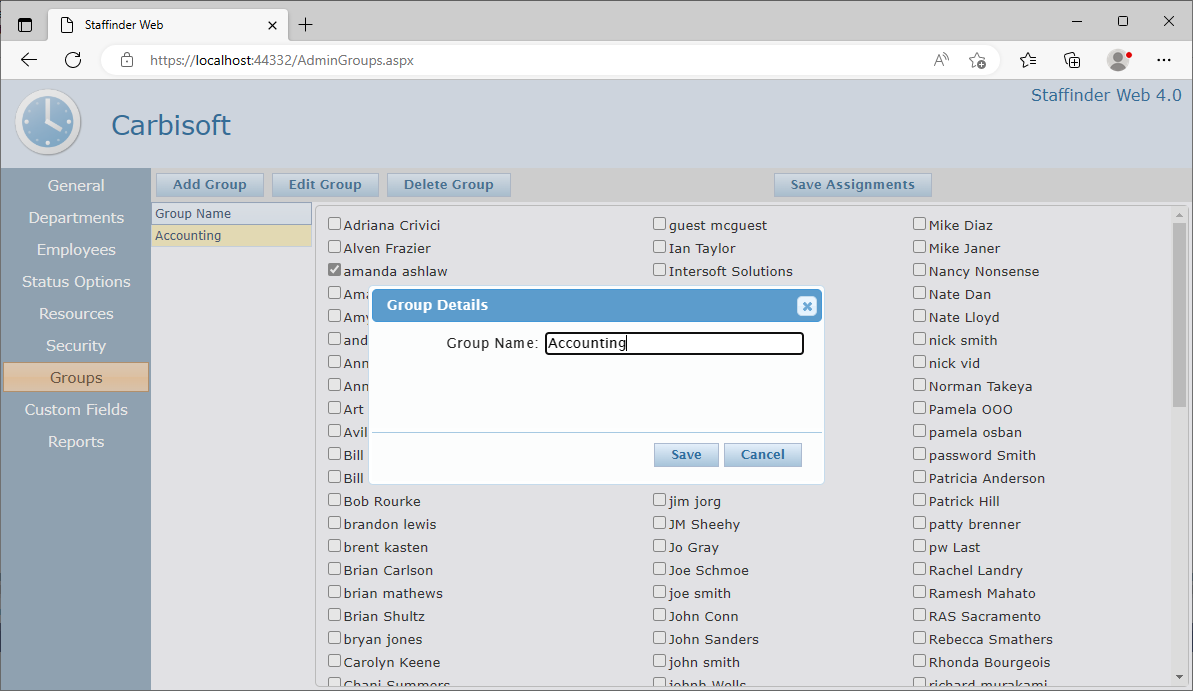
To add a Group:
- Click the Add button. The Group Details screen appears.
- Type the name of the Group in the Name
box.
- Click the Save button. The new Group
will appear in the groups list.
To delete a Group:
- In the existing group list, click the Group to be delete.
- Click the Delete button. You will be prompted with a
confirmation dialog. Click yes to delete the group.
To edit a Group:
- Click the Group in the list and click the Edit
toolbar button.
- Type the new name in the dialog box.
- Click the Save button.
To Assign an employee to a Group:
- Select the Group in the dropdown list on the right
side.
- A list of all the employees will appear below.
Place a check next to each person you wish to assign to the group.
- Click the Save button to save your
assignments.
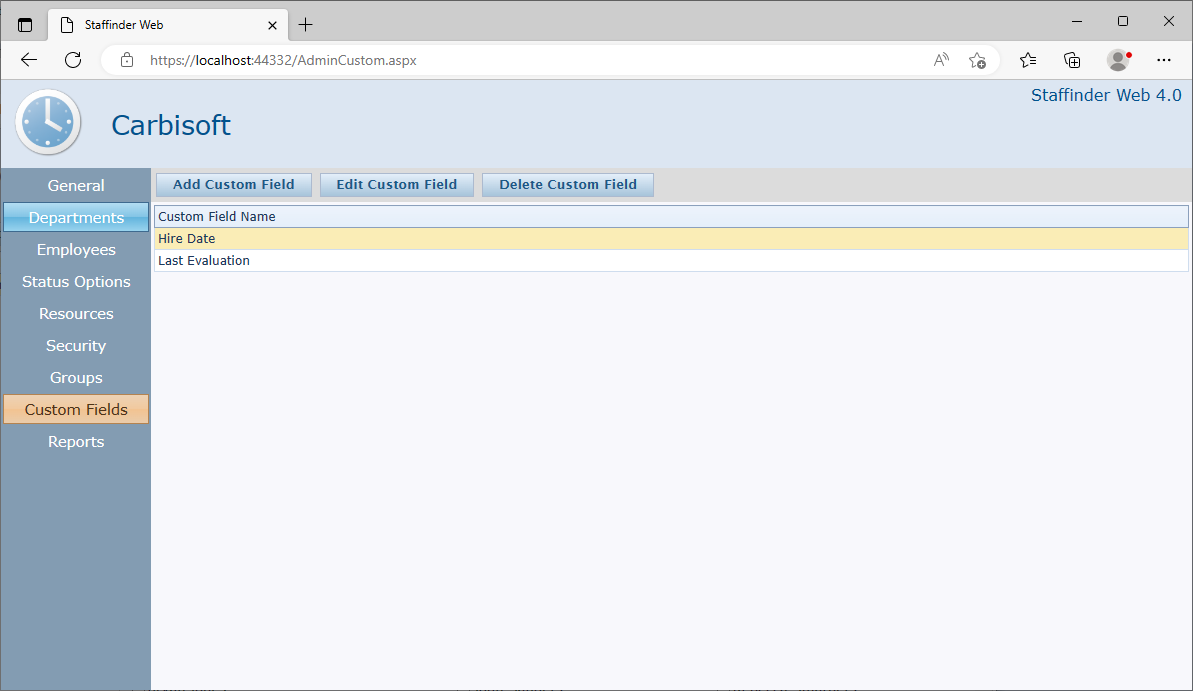
Staffinder has the ability to create custom data fields for
storing data that is not built into the application.
Each data field you create will be available in the employee details screen to
allow you to supply the information. These fields will also be available
in the browsers as a new column. You can show and hide these columns if
you choose by right clicking on the column header and un-checking it.
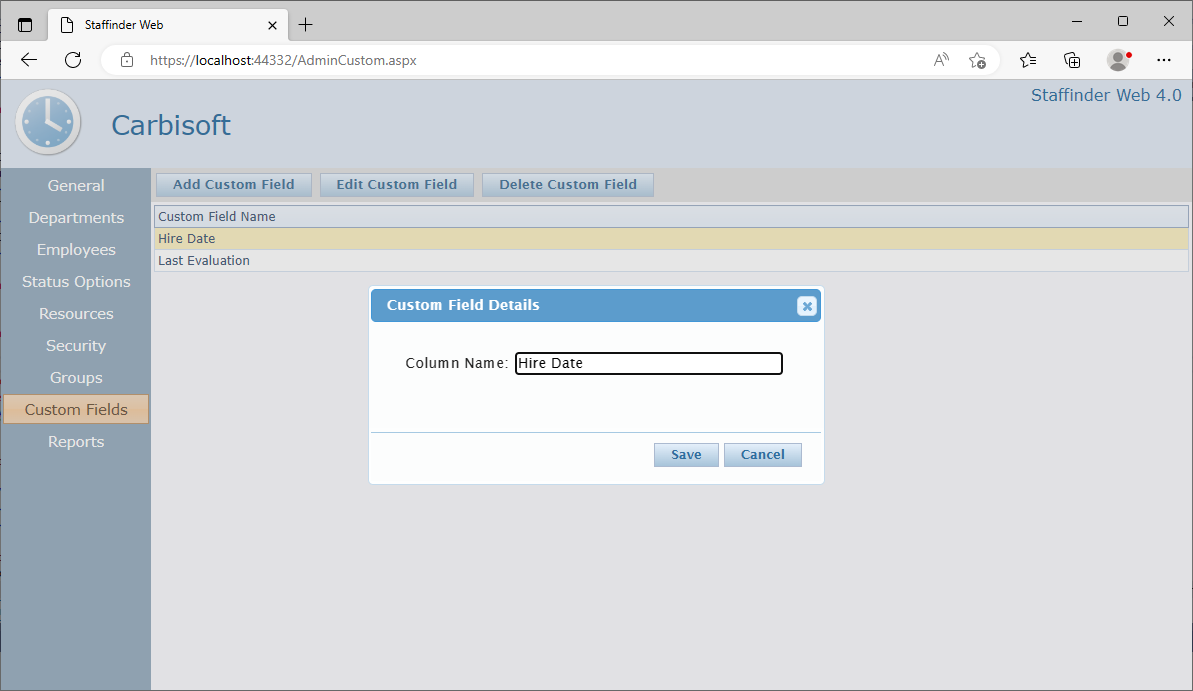
To add a custom field:
- Click the Add button. The custom field
details screen appears.
- Type the name of the field in the Name
box.
- Click the Save button. The new field
will appear in the custom data maintenance grid.
To delete a custom
field:
- In the existing grid, click the data field to be delete.
- Click the Delete button or right click on the option and click
delete from the popup menu.
To edit a custom field:
- Click the choice in the list. and click the edit
button or double-click the row in the grid.
- Type the new name in the dialog box.
- Click the Save button.
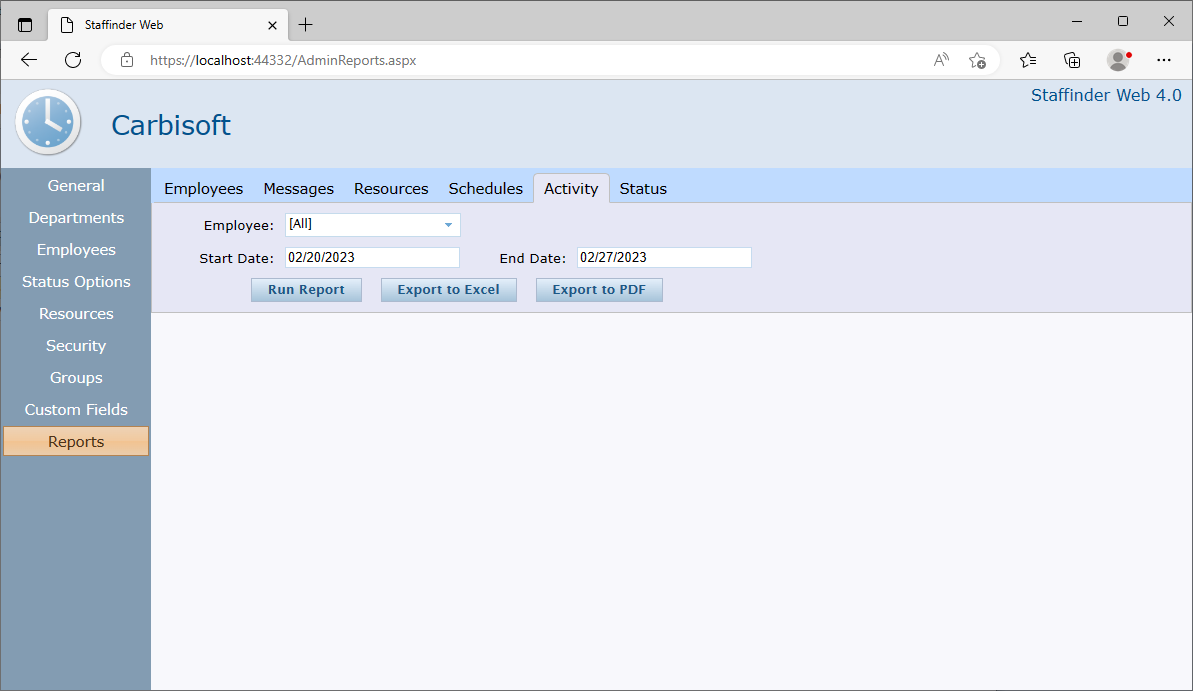
The Activity Logging
option allows administrators to turn on or off the Activity Logging
feature. When switched on, this feature maintains a log of all In/Out
transactions made by users. Information gathered in this log can
be selectively viewed or printed based on user, department and date range.
Printed reports are generated in HTML and appear in your web browser first,
then can be printed from there.
Note: If you
do not need to view or print reports of the Activity within your
organization is it recommended that you turn this feature
off as the database will accumulate in size and possibly affect Staffinder
performance.
Both reports can be filtered by several different
criteria options and Date ranges.
Activity Report: this report displays each individuals status activity.
Status Report: This report breaks down each
status activity and calculates the time spent on each activity.
This can be very useful if you want to track how much time is being
spent on productive activities.