Staffinder Professional In/Out Board - Web User's Manual - Chapter 2

Index |  Chapter 1  |  Chapter 2  |  Chapter 3  |  Chapter 4

Staffinder Professional In/Out Board - Web User's Manual - Chapter 2

Chapter 2 - Staffinder Basic Functions

Navigating the application

Before we get into the details on how to use Staffinder we should first explain how to navigate within the application.  Staffinder Web is split into different areas consisting of the Banner, Personal Menu, Navigation Menus, and the Body.
  • The Banner never changes and is used to display your company name.
  • The Main Menu Bar is where you can quickly gain access to areas in Staffinder.  This is always visible no matter where you are in the application.  You also have have quick access links to change your status, submit a vacation request, or send a message.
  • The Body is where the various screens are displayed when selected in the menu.
Main Browser

The Browser is where you will go to find the status of all your co-workers.  This screen will show you where everyone is and any comments they have left.  There is a filter bar to help you narrow down the results.  The grid is limited to the most common fileds along with any custom fields.  The remaining misc data fields are displayed in the details panel.

Filters:

  1. Groups:  This will filter the browser display based on the users group assignments.

  2. Status:  This will filter the browser display based on the users status.

  3. Department:  This will filter the browser display based on the department each user is assigned or the custom group.

  4. Name Filter:  This is a wild card search and will search the first name and last name fields automatically.

If you don't enter an Asterisk it will automatically add one at the beginning and end of the search criteria.

Columns:

  • Clicking on any header will perform a sort on that column.  Clicking again with reverse the sort into a descending order.

Details Pane:

  • This area lists the misc data fields along with the current status of the individual. Here you can change the status and the back/comments fields and update the status of this individual. If the Update Status button is disabled then you do not have permission to change this persons status.
  • Clicking the Clear button will clear out the back, comments, and the Do not Diturb flag.
  • You can quickly send a message to this person by clicking the Send Message link.

Changing your In/Out Status

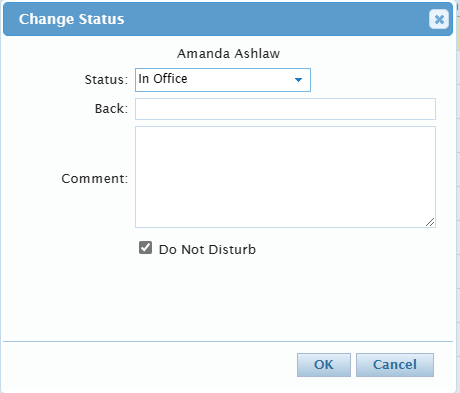
Using Staffinder, you should change your In/Out status when leaving your desk area for lunch, breaks, meetings, leaving for the day, etc.  By changing your status, you are making your location available to the other Staffinder users.  You can change your status from any screen in staffinder by clicking the Sign In/Out Link in the main menu bar.
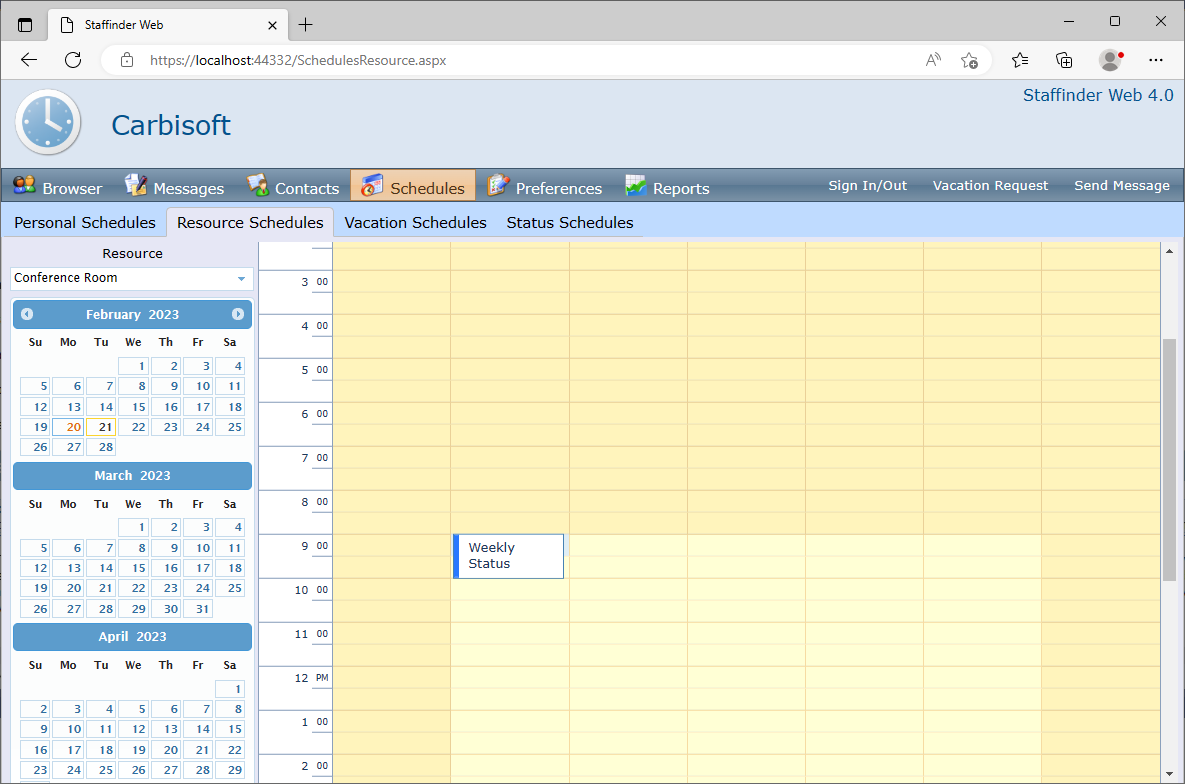
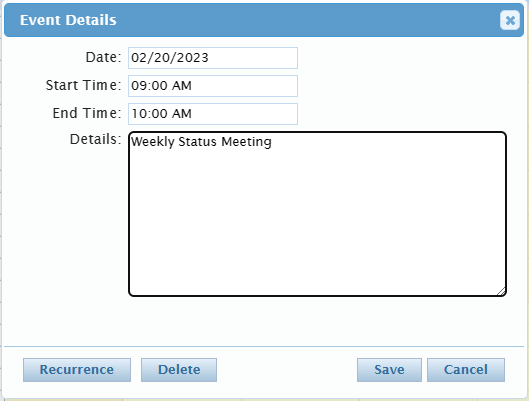
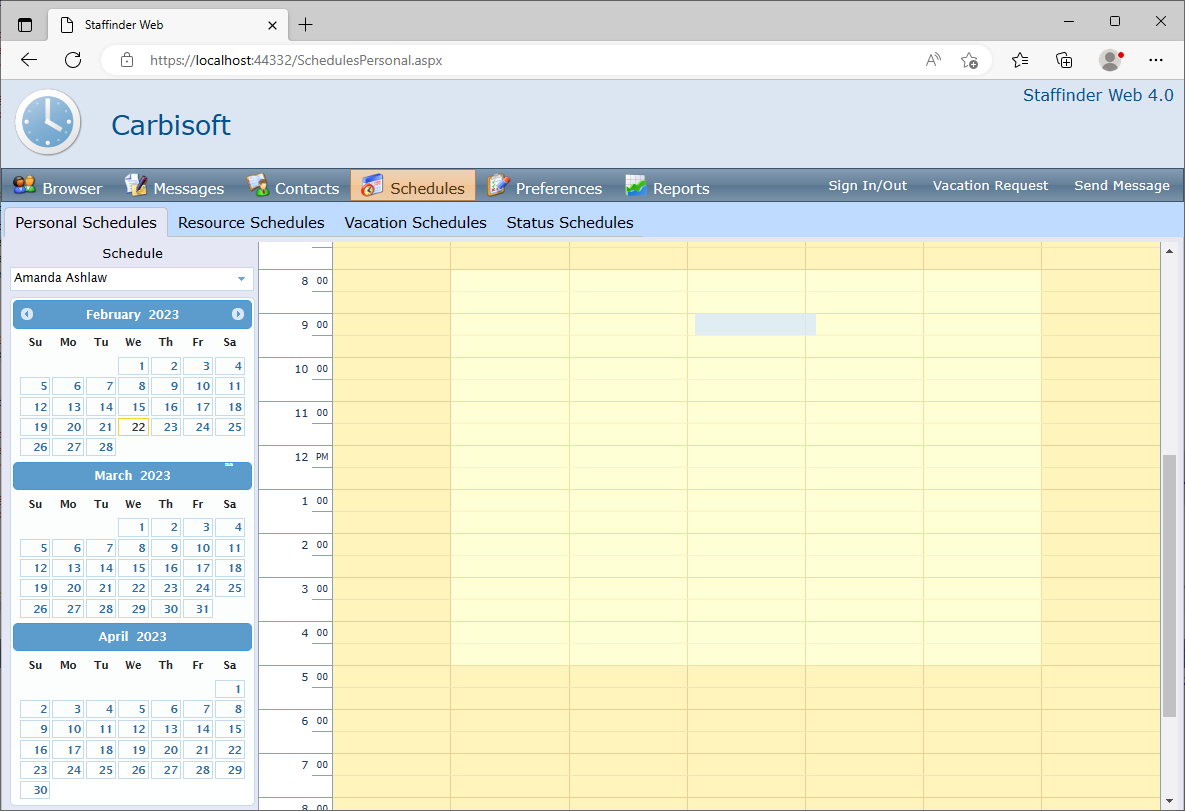
The Sign In/Out Screen options:

Status: This list contains all standard and custom In/Out choices.

Back At/On:  This box allows the user to let other staff know when they will return.  This box was designed with flexibility in mind, allowing entries like "3:40PM", "10/25/01", "Thursday", etc.

Comments:  If you would like to offer a note to other employees about your whereabouts, simply enter the text in the comments box.

Set "Do Not Disturb Flag":  Check this box if you would like the Do Not Disturb flag set.

Resource Scheduler

Resource Scheduler:
Staffinder has the ability to track time for various resources around your office.  This can be a conference room, a company vehicle, a video projector, or anything else that your employees may need to check out or book time against.

Viewing Resources: To view a resource simply select it in the Resources dropdown list.  You will see the resource along with a complete breakdown of the times throughout the day.  There are multiple views you can use to view the schedules.  Click on any time slot to popup the details screen where you can add a new event. Or click on an existing event to open the details screen in order to edit the event.

Adding an Event:

  1. Click the time slot that you want the event to start at.

  2. You will be shown the Resource schedule details screen.  Here you can enter the start and stop times for the event along with the description of the event.  Click Save to add the event.

Modifying an Event:

  1. Double-Click the event you wish to change.

  2. You will be shown the Event Details screen.  Here you can change the start and stop times for the event along with the description of the event.  Click Save to save the event.

Deleting an Event:

  1. Double-Click the event you wish to delete to open the details screen.

  2. You will be shown the Event Details screen.  At the bottom of the details screen click the Delete button.  Click OK when prompted with the confirmation dialog box.  Then click Save in the event details dialog to save everything to the server.  Clicking cancel on the event details dialog will cancel the save and the recurrence schedule will not be deleted.

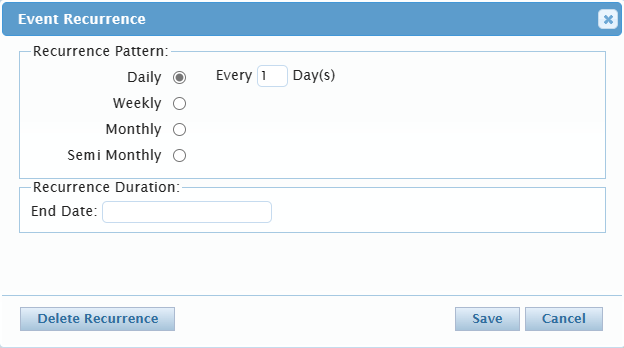
Recurring Schedules:

Recurring schedules can be setup to occur on any kind of repeating schedule.  Click the Recurrence button in the schedule details to open the recurrance details dialog.  Select the desired recurrance pattern and click the Save button to save it.  You will alos have to hit the Save button on the event details dialog to save the schedule and the recurrnace.  If you cancel the event details dialog then the recurrence will not be saved.
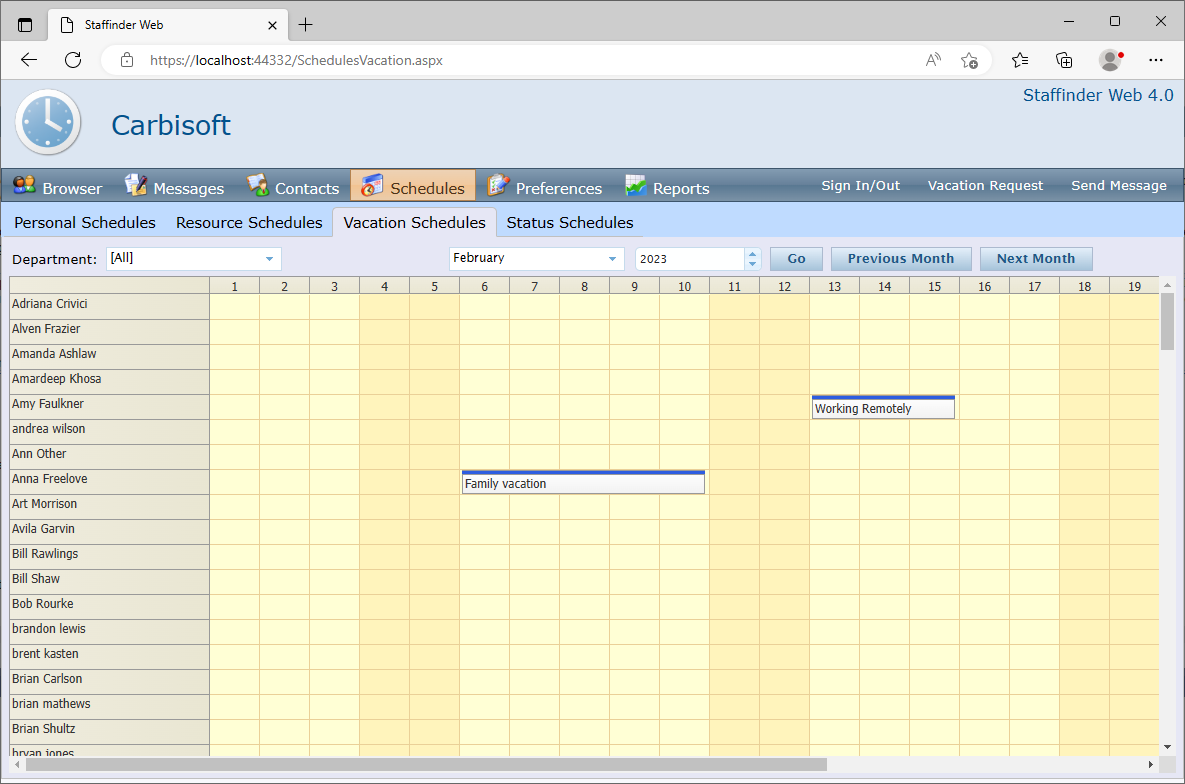
Vacation Schedules

Vacation Scheduler:
Staffinder comes with a vacation scheduler so you can keep track of time off for your employees.  This is an easy to use graphical display that you can quickly get a visual indicator of who will be gone.  You can double-click directly on the vacation scheduler on the date desired and the schedule Details screen will appear.

Also built into Staffinder is the vacation request process.  This is an effective way to track your requests and also to approve or disapprove the requests.  You can assign who is responsible for the requests in the setup screen under the employee section.  Only people whom are designated as vacation managers will be able to receive requests.

Vacation Request Process:  The person requesting time off will submit a request and assign it to the person responsible for managing vacations.  The person whom received the request will receive a message in their Vacation Requests In-Box located in the Messages menu group.  The person receiving the request will have the option of approving the request or not.  When the request has been approved or disapproved a message will be sent back to the requestor indicating what action has been taken.

Adding a schedule:
To add a schedule you simply click on the date for the person you wish to assign.  The details screen will appear where you can specify the start and end dates and also a reason.

Modifying a schedule:
To modify a schedule simply click on the schedule in the vacation scheduler main screen and the details screen will appear.  Make the necessary changes and click Ok.

Deleting a schedule:
click on the schedule you wish to delete to open the details screen for that event.  Click the Delete button at the bottom and confirm the deletion.


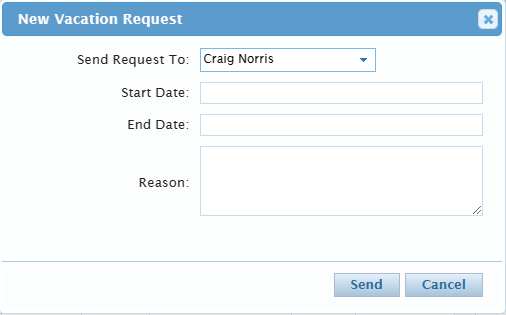
This is a view of the request screen that the user will fill out when they need to take time off.  They will have the option of who to send the request to. This will list all the people who have been assigned the Vacation Manager flag in the employee details.

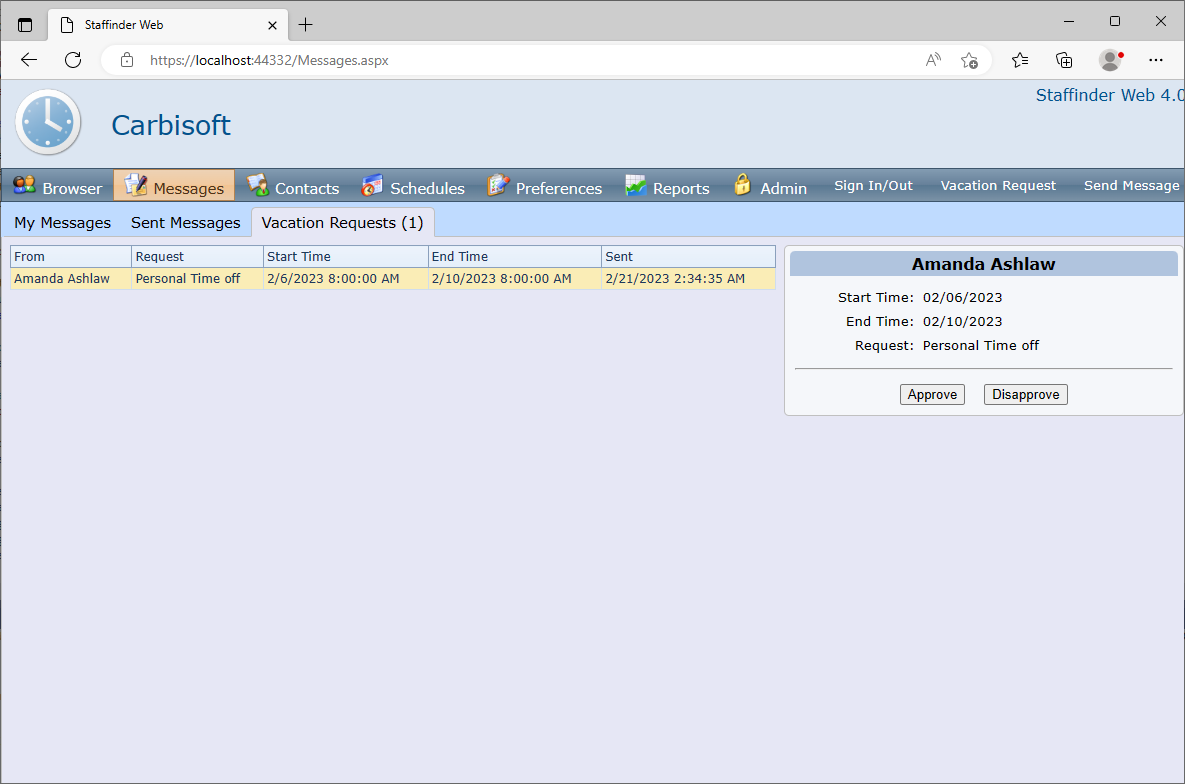
This is a view of the request that the authorizing person will receive.  If you have been designated as a vacation administrator in the setup screen you will have a new item in the Messages group in the navigation bar called "Vacation Requests".  This list will contain all the request that you have received.  Once you approve or disapprove the request it will be removed from your list and a message with the results of your decision will be sent to the requestor.

Personal Schedules

Personal Scheduler:
Staffinder has a Personal scheduler so you can keep track of your daily activities.  This is essentially the same as the resource scheduler only it applies to you and only you.  All the functions, features, and display options are the same as the resource scheduler.  See the Resource Scheduler functions on how to manage your schedule.

Security:  You also have the ability to allow others to view your schedule and also make changes to your schedule.  This is done in the preferences section (chapter 3).
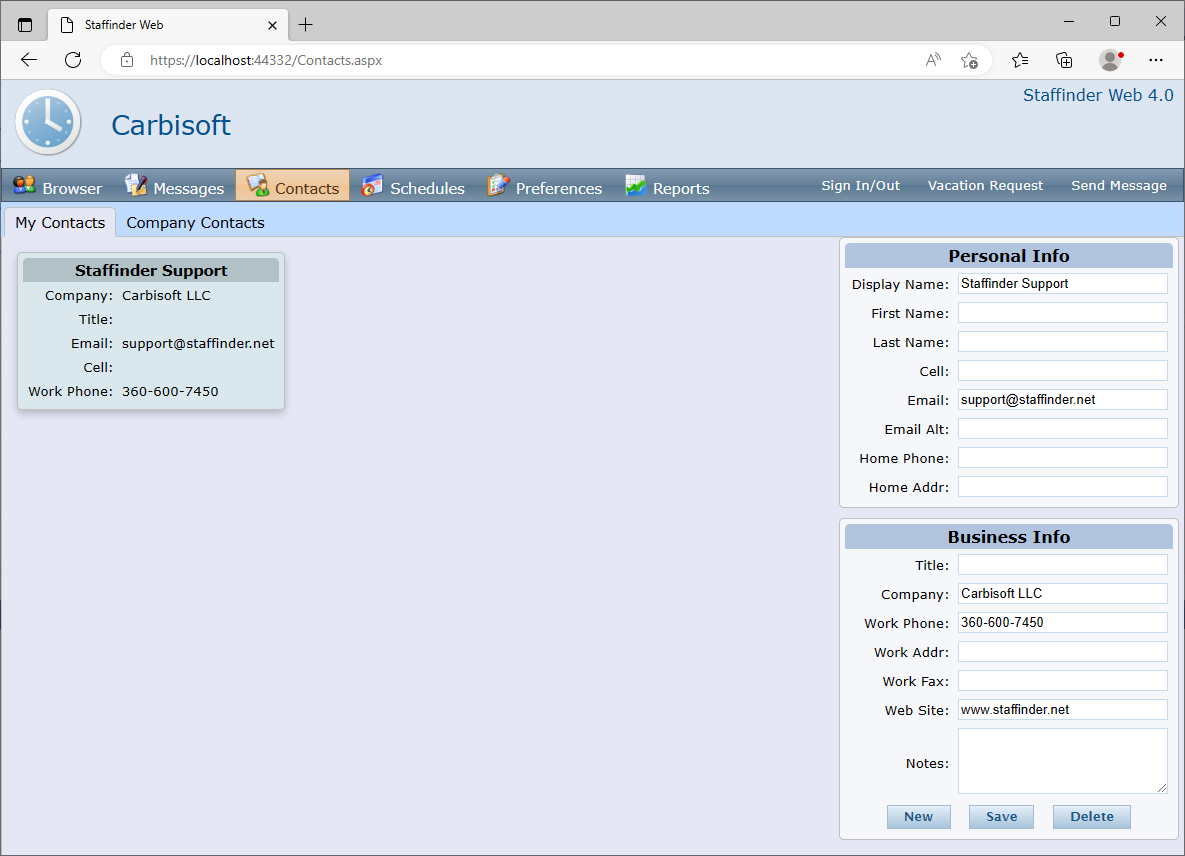
Contacts

Contact Management:
Staffinder has the ability to manage your contact information.  We have provided the ability to maintain personal as well as public Company Contacts.   Company Contacts are those that are shared among all employees and are visible to everyone.  "My Contacts" are those that only you have access to.

Index |  Chapter 1  |  Chapter 2  |  Chapter 3  |  Chapter 4


User Manuals