|
Index |
Chapter 1 |
Chapter 2 |
Chapter 3 |
Chapter 4 |
Chapter 5 |
Chapter 6
Chapter 6 - Administrators Guide
(Tools > Setup)
This Administrators Guide is designed for
those responsible for setting up and maintaining the Staffinder infrastructure.
This infrastructure includes all data and settings necessary to enable
the complete and proper operation of the program. Once Staffinder
is configured with your company's departments, employees, in/out choices
and other settings, it can be maintained by IT or selected Staffinder administrators.
While many computerized In/Out systems
utilize a separate administrative console, Staffinder designers have incorporated
the administrative components (Setup) into the client application.
This design was intended to: a) eliminate the need to install an
administrative client, and b) allows Staffinder to be administrated from
any client PC or laptop.
Running Staffinder for the first time:
The first time Staffinder is run, the program will display the "Welcome
to Staffinder" screen that lets you know of special
instructions prior to running staffinder. simply click the "OK"
button and you will be taken into the setup screen.
After Staffinder is installed on any computer
in your environment, it can be used to configure and administer the program.
To open Setup follow these steps:
- Start Staffinder. If this is the very first time Staffinder
has been run, follow the on-screen instructions to establish and configure
an initial database. After this initial configuration, the following
steps will apply.
- From the drop down menu, click Tools
- From the drop down list, click Setup
- The following sections explain the various section of the Setup
program.
| Setting up your Organization |
- Before you can perform any task on these screens, the Administrator
Password must be entered. The Administrator Password shipped
by default with the program is "Admin" (case sensitive). We strongly
recommend changing this password just after installation by clicking
the "Change" button on this screen after you login with the default
password.
- To add departments and groups to your configuration, type a department
name in the New Department or Group box and click the Add
button. It will appear below in the Existing Departments or
Groups box. See Figure 6.1.
- If you need to remove a department, highlight the department in
the Existing Departments or Groups box and click the Delete
button. To correct a misspelled Department or Group, a delete
and recreate will be necessary.
- You can change the name of the department at any time by selecting
it in the list and clicking the Rename button.
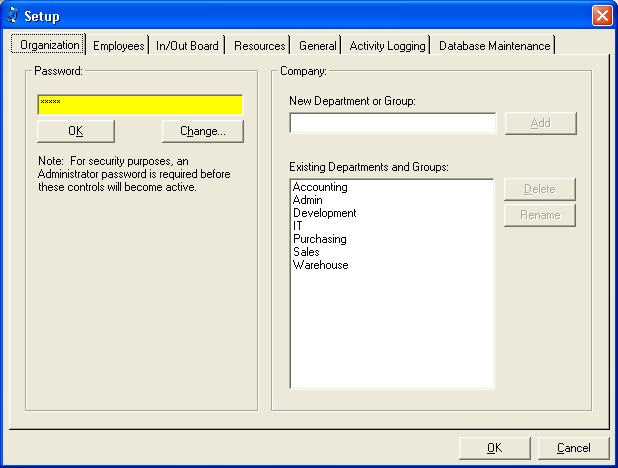
Figure 6.1
| Setting up your Employees |
Important Note: The best strategy to use
when adding employees is to add the managers first. While it is not
required to assign users a manager, built-in Security functions will not
work completely if users are not assigned a manager.
To Add employees:
- In the Add Employee frame, click the New button.
See Figure 6.2.
- Add employee information to the First Name and Last Name
boxes.
- Select this employee's department in the Department box.
If the desired department is not in the list, go back to the Organization
tab and create it.
- In the Manager box, select a manager from the list.
If the manager is not in the list, you can always go back and add it
later.
- Add this employee's phone information in the Extension, Pager,
Mobile and Home boxes.
- Add this employee's E-Mail address.
- If this person is a manager, check "This employee is a Manager".
- If this person is a receptionist, check "This employee is a Receptionist"
- If this person will need to manage the vacation scheduler and
approve or disapprove vacation requests then you need to check "This
employee may manage vacation schedules"
Important Note:
Passwords are
automatically assigned to each new employee added to Staffinder.
Staffinder uses the employee First Name as the default password.
These passwords are case-sensitive. Please encourage your employees
to change their password when they start using Staffinder to avoid security
problems. Example: If you create a user name "Elmer Harris",
his Staffinder password is "Elmer".
Tip:The checkboxes for "This person is a Manager/Receptionist"
are directly related to the security features in Staffinder.
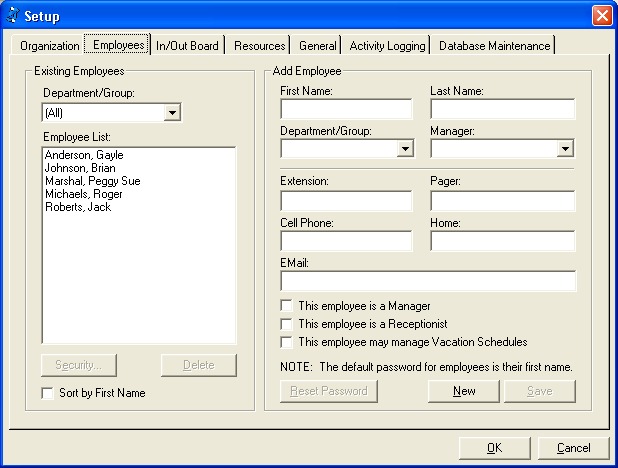
Figure 6.2
To Delete employees:
- In the Existing Employees frame, click the user to be delete (Figure
6.2).
- Click the Delete button.
Tip: If you attempt to delete a manager
who has employees assigned to them, you will receive a warning that
those employees will need to have another manager assigned to them.
To Reset an employees Password:
If someone forgets their password you can reset it by selecting the
individual in the list and clicking the Reset Password button. The
password will be set to their first name.
The Security Button:
Staffinder has the ability to impose security settings on employees without
having to either go to the users desk or log in as them to change them.
Now, administrators can make security changes from the Setup screen.
It is also possible to impose a certain set of security settings across
every employee with just one click. However, this does not apply
to the custom security settings. You will only be able to apply
the basic security options.
Simply select any employee and click the Security Button (Figure 6.2).
You will be shown the security screen (Figure 6.3). Make your desired
security settings. Check the box at the bottom to apply the changes
to all users. Click OK and your done. If you do not want
your users changing these settings then be sure to disable the security
option in the General tab. This is discussed later in this chapter.
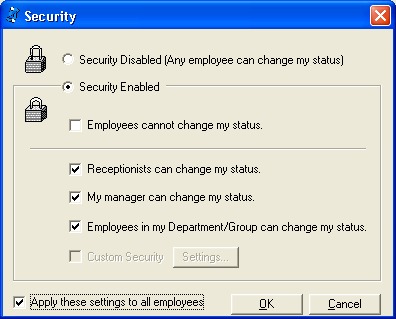
Figure 6.3
| Configuring the In/Out Board Choices |
Next, click the "In/Out Board"
tab (Figure 6.4) to begin customizing the In/Out board options your users
will see when using Staffinder.
Staffinder ships with 8 standard
In/Out choices that cannot be deleted, edited or duplicated.
These are In Office, Break, Lunch, Out for the Day, Sick, Meeting, Doctor
and Vacation. You can add additional selections as needed to fit
your business needs and configure them with custom icons if desired.
See Figure 6.4.
To add Custom In/Out Board
choices:
-
Type the name of the Custom Choice in the New Choice
box.
-
Select the row background color. This will
allow the clients to turn on row coloring for easier readability.
-
Select the windows icon you wish to assign.
This can be any standard windows icon. Be sure to use a
transparent background.
-
Click the Add button. The choice will appear
in the Existing Choices box below.
To delete Custom In/Out
Board choices:
-
Click the choice in the Existing Choice list.
-
Click the Delete button. The choice should
be removed.
Note: Any changes you make to
these settings will require all users to shut down Staffinder and restart
it for them to take affect.
To change the image or
row color for
In/Out Choice:
-
Select the In/Out board option in the list that you'd like to change.
-
Click the Change Image or Change Color button.
-
A dialog box will appear allowing you to select the icon
or choose the Row Color.
-
Click the OK button.
For more information on icons,
including a FREE download of a sample icon gallery, click
HERE.
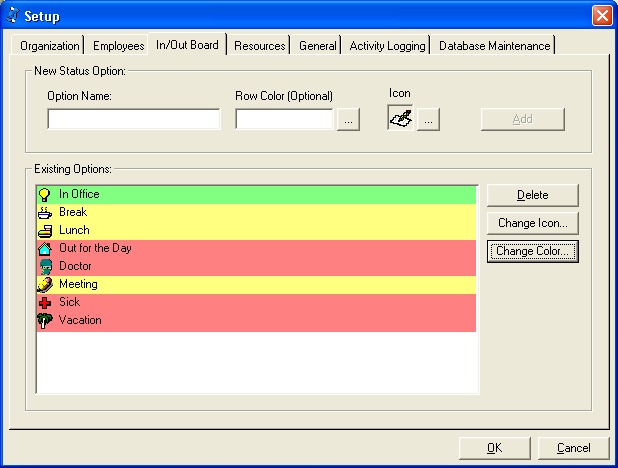
Figure 6.4
The Resources tab (Figure 6.5) is
for configuring resources. Resources can be anything you wish to
schedule time against. Conference rooms are the most common
resources but you can use almost anything you like. Video Equipment
such as an Infocus machine is a good example of something you may wish
to keep track of. Depending on what the resource may be will also
determine the time increments you will want to use. We include Company
Events as a pre configured resource. You can use this resource for
any company wide events that employees will want to know about. Company
parties for employee birthdays or retirements are good examples of event
to track.
To add a resource:
-
Type the name of the resource in the Resource Name
box.
-
Select the time increment you would like the resource
to use.
-
Click the Add button. The choice will appear
in the Existing Resources box.
To delete a Resource:
-
Click the choice in the Existing Choice list.
-
Click the Delete button. The choice should
be removed.
Note: Any changes you make to
these settings will require all users to shut down Staffinder and restart
it for them to take affect.
To edit a Resource:
-
Click the choice in the Existing Choice list.
-
Type the new name in the Resource Name box and/or
select the time increment.
-
Click the Save button.
Note: Any changes you make to
these settings will require all users to shut down Staffinder and restart
it for them to take affect.
To assign security
permissions:
-
Click the choice in the Existing Choice list.
-
Click the Security button below the list to
open the custom security screen figure(6.6). This is where you
assign who is responsible for keeping the resource up to date.
If you wish to allow anyone the ability to add and remove events
then disable the security feature.
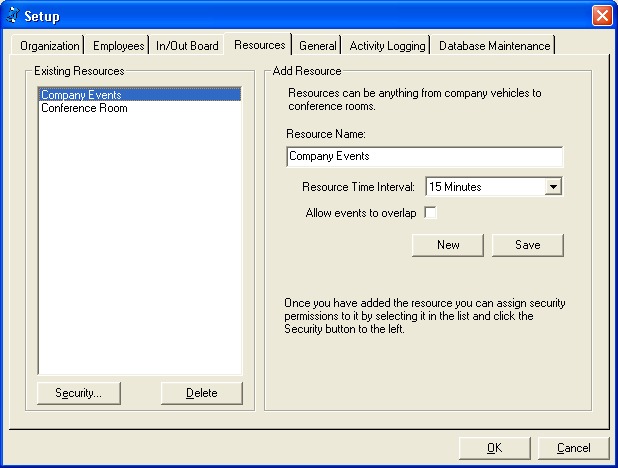
Figure 6.5
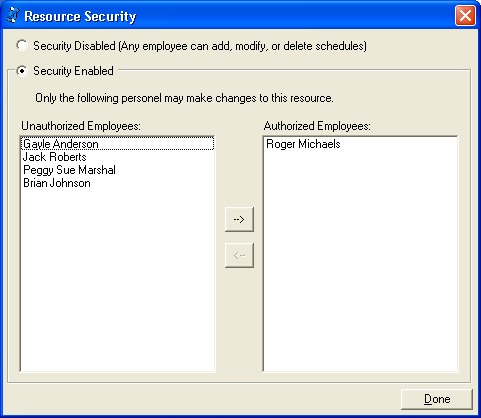
Figure 6.6
| Employee Security, Phone Info Settings and
Network Time |
The General tab (Figure 6.7) includes
setting for Employee Access and setting a Time Server. They include:
Allow Security Changes:
If you would like employees to manage their own security settings, check
the Allow Security Changes box. To see the Security settings screen,
see Chapter 2
of this users manual.
Allow Phone Info Changes:
When an employee opens Employee Properties on their own record, they
may have the ability to modify their phone (cell, home, etc.) settings.
This setting will determine if employees will have the ability to make
these changes to their own record.
Disable Messaging Ability:
If you do not with to use this feature it may be turned off here by
checking this option. Users will not see any of the messaging
features within the application.
Allow Receptionist to manage
messages:
If you are using the messaging features you may also allow your
receptionist to view and modify other users messages. This is
handy if you have personnel that call in from outside the office to
get their messages. The receptionist can view their messages
and also delete them as the person is notified. The
receptionist will also see a new column in the browser that will
quickly indicate how many messages each person has.
Network Settings: This
setting allows Staffinder workstations to acquire date and time information
from a Windows NT or 2000 server rather then their local workstation.
If you use Staffinder to track employee time, pulling time and date
from a known accurate server can eliminate users from making clock adjustments
to "doctor" time calculations. Follow the instructions on the
screen for proper usage.
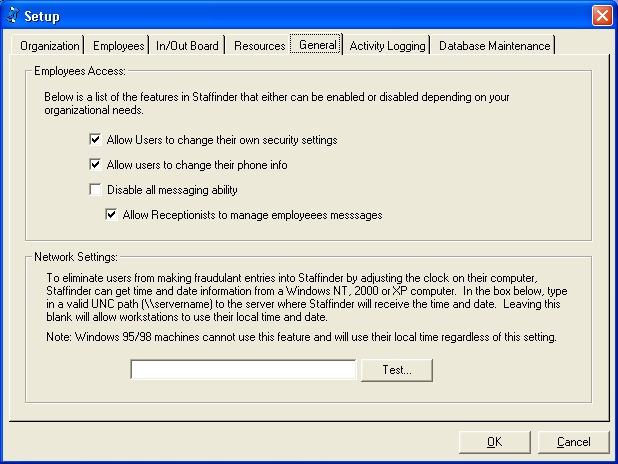
Figure 6.7
The Activity Logging tab
(Figure 6.8) allows administrators to turn on or off the new Activity Logging
feature. When switched on, this feature maintains a log of all In/Out
transactions made by users. Information gathered in this log can
be selectively viewed or printed based on user, department and date range.
Printed reports are generated in HTML and appear in your web browser first,
then can be printed from there.
Note: If you
do not need to view or print reports of the Activity Log, turn this feature
off as the database will accumulate in size and possibly affect Staffinder
performance.
Both reports can be filtered by several different
criteria options and also different sorting abilities.
Activity Report: this report displays each individual status activity.
Status Report: This report breaks down each
status activity and calculates the time spent on each activity.
This can be very useful if you want to track how much time is being
spent on productive activities.
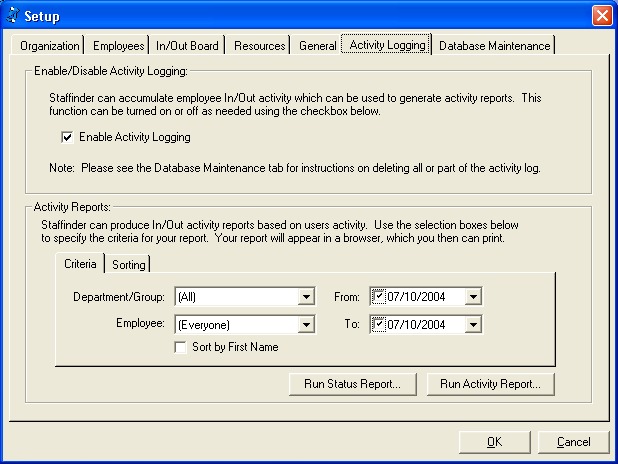
Figure 6.8
The Database Maintenance
tab (Figure 6.9) is used to maintain the Staffinder database, but not needed
during the Setup process. Here you have the ability to truncate the
history log or the past resource events. Just select the date range
to delete and the appropriate button to perform the action.
If you wish to save the data you can export it to a text file prior to
deleting it by checking the Save to file option.
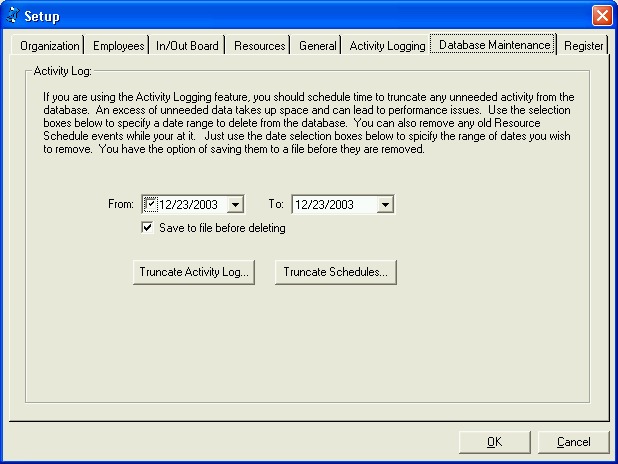
Figure 6.9
| Receiving your Registration Key... |
Once we notice of your payment, we will be informed of your purchase
and given your e-mail address. We will then send you an e-mail
with your company name and registration key you'll use "unlock" your
5-user demo. If you ordered via PayPal using a credit card, expect
notification within 24-hours. Those paying with company checks will
receive notice after your check has been received and processed.
Important: We get many emails indicating that they have not
received their registration information after several days. Be
aware that Spam Filters will block our emails. If you don't
receive our email within 24 hours please check your spam log for our
email before you contact us. Our email is flagged as Important
and also will request a Read Receipt. Please honor this when you
get the registration email so we know that you received it correctly.
You
would then enter your company name and code into the space provided on
the "Register" tab in the Setup (figure 6.10). After you enter the correct
company name and code, Staffinder will again thank you for the purchase
and confirm the program is now unlocked. After the program is successfully
unlocked, the Register tab will no longer appear and you can enter add
your remaining employees.
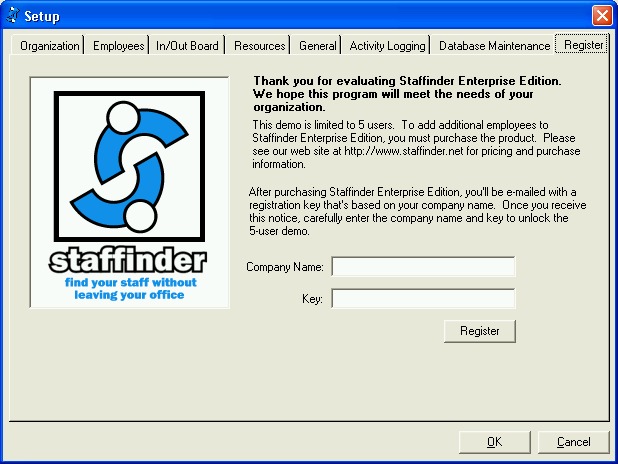
Figure 6.10
Index |
Chapter 1 |
Chapter 2 |
Chapter 3 |
Chapter 4 |
Chapter 5 |
Chapter 6
|